
I still remember my early days as a bush pilot in Alaska, when how to read a weather chart for pilots was a matter of life and death. One particular flight that stands out was when I had to navigate through a dense fog bank over the mountains. My instructor’s words echoed in my mind: “A good pilot always respects the weather, and a great pilot knows how to read it.” As I delved deeper into the world of aviation, I realized that many pilots struggle with deciphering those complex weather charts. It’s a skill that can make all the difference between a safe landing and a potentially disastrous situation.
In this article, I’ll share my step-by-step approach to mastering weather charts, focusing on the fundamentals that every pilot should know. You’ll learn how to identify key weather patterns, understand forecast models, and make informed decisions about your flight plan. My goal is to provide you with practical advice that you can apply immediately, whether you’re a seasoned pilot or just starting out. By the end of this guide, you’ll be well on your way to becoming proficient in how to read a weather chart for pilots, and you’ll be able to navigate the skies with confidence and precision.
Table of Contents
- Guide Overview: What You'll Need
- Step-by-Step Instructions
- Mastering Weather Charts
- Navigating the Skies with Confidence: 5 Essential Tips for Reading Weather Charts
- Key Takeaways for Mastering Weather Charts
- Navigating the Skies with Confidence
- Bringing It All Together: Mastering Weather Charts
- Frequently Asked Questions
Guide Overview: What You'll Need

Total Time: 1 hour 30 minutes
Estimated Cost: $0 – $20
Difficulty Level: Intermediate
Tools Required
- Pencil (for marking charts)
- Eraser (for correcting mistakes)
- Ruler (12 inches long)
- Protractor (for measuring angles)
- Computer or Mobile Device (with internet access for weather charts)
Supplies & Materials
- Weather Chart (printed or digital)
- Meteorology Guide (for reference)
- Pilot’s Handbook (for specific aircraft information)
Step-by-Step Instructions
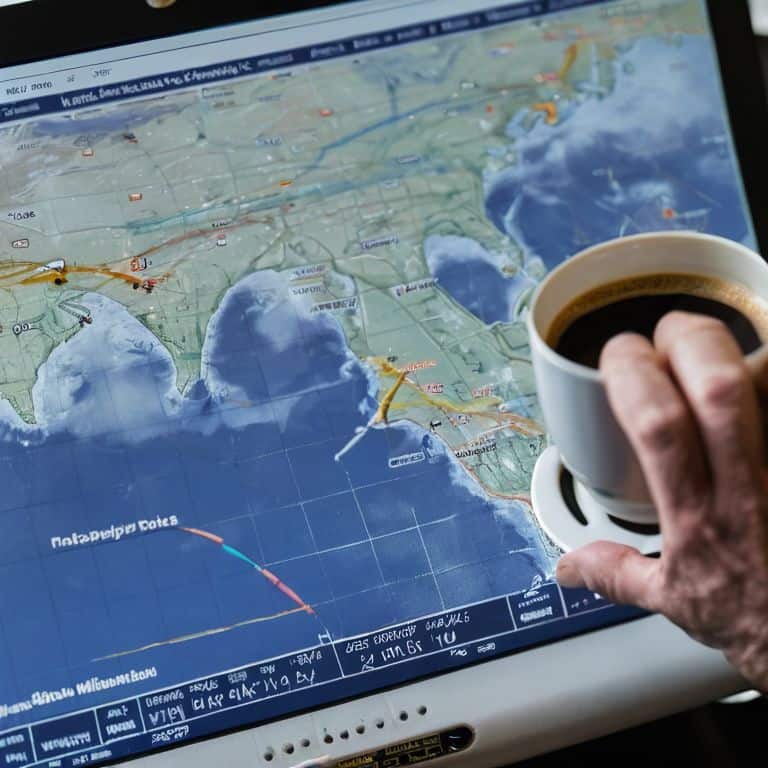
- 1. First, let’s start by understanding the basics of a weather chart, which is essentially a map of the current and forecasted weather conditions. To read a weather chart, you’ll need to familiarize yourself with the various symbols, colors, and markings used to represent different types of weather systems, such as high and low-pressure systems, fronts, and precipitation areas. Start by identifying the legend, which is usually located at the bottom or side of the chart, and take a few minutes to review the different symbols and their meanings.
- 2. Next, take a look at the overall pattern of the weather chart, noticing the large-scale features such as high and low-pressure systems, fronts, and any areas of precipitation. This will give you a sense of the big picture, helping you to understand how the different weather systems are interacting with each other. Pay particular attention to any areas of low pressure, as these can often be associated with inclement weather.
- 3. Now, let’s zoom in on the specifics of the chart, starting with the isobars, which are the lines that connect points of equal atmospheric pressure. These lines can give you valuable information about the strength and direction of the winds, as well as the movement of weather systems. Look for any areas where the isobars are close together, as this can indicate strong winds or turbulent air.
- 4. Moving on to the fronts, which are the boundaries between different air masses, it’s essential to understand the different types of fronts and how they can affect the weather. Cold fronts, for example, are typically associated with a decrease in temperature and an increase in precipitation, while warm fronts are often marked by an increase in temperature and a decrease in precipitation. Be sure to note the location and movement of any fronts, as these can have a significant impact on your flight plan.
- 5. In addition to the fronts, you’ll also want to look for any areas of precipitation, which can be indicated by a variety of symbols, such as clouds, rain, or thunderstorms. Thunderstorms, in particular, can be a significant hazard for pilots, so it’s crucial to understand how to identify them on the chart. Look for areas of turbulence or wind shear, which can be indicated by special symbols or markings on the chart.
- 6. Once you have a good understanding of the overall weather pattern, it’s time to start thinking about how it will affect your flight plan. Consider the wind direction and speed, as well as any areas of turbulence or precipitation, and think about how these factors will impact your route and altitude. You may need to adjust your plan to avoid any areas of bad weather or to take advantage of favorable winds.
- 7. Finally, don’t forget to check the forecast, which is usually provided in a separate section of the chart or in a accompanying document. This will give you an idea of how the weather is expected to change over time, allowing you to plan your flight accordingly. Keep an eye on any changing weather patterns, such as the movement of fronts or the development of new weather systems, and be prepared to adjust your plan if necessary.
Mastering Weather Charts

As we dive deeper into mastering weather charts, it’s essential to consider the role of _upper air charts_ in flight planning. These charts provide critical information about wind patterns, temperature, and humidity at various altitudes, helping pilots anticipate potential hazards such as wind shear. By combining upper air charts with surface weather observations, pilots can gain a more comprehensive understanding of the atmospheric conditions they’ll encounter during flight.
To further enhance their weather awareness, pilots can utilize _aviation weather forecasting tools_ such as satellite imagery and radar. Interpreting satellite imagery requires practice, but it can provide valuable insights into large-scale weather patterns, including fronts, low-pressure systems, and thunderstorm activity. By incorporating these tools into their pre-flight routine, pilots can make more informed decisions about route planning, altitude selection, and weather deviation.
In addition to these tools, a thorough _pilot weather briefing checklist_ is crucial for ensuring that all relevant weather information is considered before takeoff. This includes reviewing weather chart symbols and abbreviations, as well as understanding the meteorology for private pilots concepts that underlie weather forecasting. By taking a systematic approach to weather planning, pilots can reduce their exposure to weather-related risks and enjoy a safer, more efficient flight.
Decoding Wind Shear for Pilots
Decoding wind shear is a critical aspect of mastering weather charts. As a pilot, understanding wind shear can mean the difference between a safe flight and a potentially hazardous one. I like to think of wind shear as a sudden change in air traffic – just as you would adjust your flight plan to avoid congested airspace, you need to be aware of wind shear to navigate through shifting wind patterns.
To identify wind shear on a weather chart, look for areas where wind speed or direction changes rapidly. This can be indicated by tight isobars or a significant shift in wind arrows. By recognizing these signs, you can take necessary precautions to ensure a smooth flight, such as adjusting your altitude or route. Remember, staying ahead of wind shear is like flying ahead of the weather – it’s all about anticipation and preparation.
Interpreting Satellite Imagery for Flight
When analyzing satellite imagery, I like to think of it as scanning the horizon for signs of changing weather patterns. As a pilot, being able to interpret these images can give you a significant edge in planning your flight. Look for cloud formations, storm systems, and other indicators of weather activity. By combining this information with your weather chart data, you can build a comprehensive picture of the conditions you’ll face during your flight.
I recommend starting with visible satellite imagery, which can help you identify cloud types and heights. From there, you can move on to infrared and water vapor imagery to get a better sense of the underlying weather patterns. By taking the time to study these images, you’ll be better equipped to make informed decisions about your flight plan and ensure a safe and successful journey.
Navigating the Skies with Confidence: 5 Essential Tips for Reading Weather Charts
- Understand the Basics: Familiarize yourself with the different types of weather charts, including surface analysis, upper air charts, and forecast charts
- Identify Key Weather Features: Learn to recognize and interpret significant weather features such as high and low-pressure systems, fronts, and wind patterns
- Analyze Wind and Temperature: Understand how to read wind direction, speed, and temperature gradients, and how they impact flight planning and navigation
- Use Satellite Imagery: Incorporate satellite imagery into your weather analysis to gain a better understanding of cloud patterns, precipitation, and other weather phenomena
- Stay Up-to-Date: Always use the most current weather charts and forecasts, and be aware of any updates or changes that may impact your flight plan
Key Takeaways for Mastering Weather Charts
Understanding how to read a weather chart is crucial for safe flight planning, and it’s a skill that can be developed with practice and patience
Decoding wind shear and interpreting satellite imagery are essential components of mastering weather charts, allowing pilots to make informed decisions about their flight route and timing
By following a step-by-step approach to reading weather charts, pilots can improve their ability to predict weather patterns and make safe flying decisions, even in complex or changing weather conditions
Navigating the Skies with Confidence
Reading a weather chart is not just about predicting storms, it’s about understanding the rhythm of the atmosphere, and once you master that, you’ll be flying with a sixth sense that guides you through even the most unpredictable skies.
Daniel Sato
Bringing It All Together: Mastering Weather Charts
As we conclude this step-by-step guide on how to read a weather chart for pilots, let’s summarize the key points we’ve covered. We started with the basics of understanding weather charts, moved on to mastering wind shear for pilots, and then dove into interpreting satellite imagery for flight. These skills are crucial for any pilot, and by following these simple yet effective steps, you’ll be well on your way to becoming a proficient weather chart reader. Remember, practice makes perfect, so be sure to apply these skills to your upcoming flights.
As you continue on your journey to become a skilled pilot, keep in mind that mastering the fundamentals is key to success. Don’t be afraid to take to the skies and apply your knowledge of weather charts to real-world scenarios. With time and practice, you’ll become a pro at decoding the skies, and the freedom and thrill of flight will be yours to enjoy. So go ahead, take the controls, and let the art of flight be your guide.
Frequently Asked Questions
What are the most critical elements to look for when analyzing a weather chart for flight planning?
When analyzing a weather chart, I always tell my students to focus on the big three: wind direction and speed, precipitation patterns, and any areas of low pressure or fronts. These elements will give you a solid foundation for making informed flight planning decisions and ensuring a safe journey.
How do I differentiate between various types of weather systems, such as fronts and low-pressure systems, on a chart?
Let’s break it down: to differentiate between fronts and low-pressure systems, look for distinct symbols and colors on your chart. Fronts are typically marked with lines and triangles, while low-pressure systems are often represented by a large ‘L’ or a closed isobar. Think of it like navigating through different air masses – each has its own unique signature.
What role do wind patterns and jet stream positions play in interpreting weather charts for pilots?
When reading weather charts, understanding wind patterns and jet stream positions is crucial. Think of it like navigating a river – knowing the currents helps you steer safely. Wind patterns show you where air masses are moving, while the jet stream’s position can indicate turbulence or favorable tailwinds, affecting your flight plan.