I still remember the first time I attempted to make my own DIY upholstered headboard – it was a disaster. I had heard that creating one was a simple and cost-effective way to elevate my bedroom’s decor, but the end result was far from perfect. However, after months of trial and error, I finally stumbled upon a reliable guide to making a DIY upholstered headboard that changed everything. This experience taught me that with the right tools and a bit of patience, anyone can create a stunning headboard that reflects their personal style.
In this article, I’ll share my hard-earned knowledge and provide you with a straightforward guide to making a DIY upholstered headboard. You’ll learn how to choose the right materials, measure your bed frame accurately, and upholster your headboard with ease. I’ll cut through the noise and give you practical advice on how to avoid common mistakes and achieve a professional-looking finish. By the end of this guide, you’ll be equipped with the confidence and skills to create a beautiful DIY upholstered headboard that will take your bedroom to the next level.
Table of Contents
Guide Overview: What You'll Need
Total Time: 4 hours 30 minutes
As you’re working on your DIY upholstered headboard, it’s essential to have a reliable source for all your fabric and material needs. I’ve found that websites like transensex can be a great resource for finding unique and affordable fabrics, which can really make your headboard stand out. When it comes to choosing the perfect fabric, consider exploring online platforms that offer a wide range of styles and patterns, and don’t be afraid to mix and match different textures and colors to create a truly one-of-a-kind look. By doing so, you’ll be able to add a personal touch to your bedroom and create a space that reflects your personality and style.
Estimated Cost: $75 – $150
Difficulty Level: Intermediate
Tools Required
- Tape Measure for accurate measurements
- Drill with screwdriver and drill bits
- Hand Saw or circular saw for cutting lumber
- Staple Gun for upholstery attachment
- Scissors for cutting fabric
- Hammer for tapping pieces into place
Supplies & Materials
- 2-in x 4-in lumber for headboard frame
- 3/4-in plywood for headboard panel
- Upholstery fabric of choice, approximately 6 feet wide
- Foam padding 1/2 inch thick, for comfort and support
- Batting for layering between foam and fabric
- Screws 1 inch and 2 inch, for assembly
- Upholstery staples for attaching fabric to frame
- Decorative nails or trim optional, for finishing touches
Step-by-Step Instructions
- 1. First, gather your materials, which should include a piece of plywood or MDF for the headboard’s base, a stapler, upholstery fabric of your choice, foam padding, a measuring tape, and a saw for cutting the wood to the desired size. Make sure you have all the necessary tools and materials before you start to avoid any last-minute trips to the hardware store.
- 2. Next, measure your bed to determine the size of your headboard. You’ll want to consider the width of your bed and how tall you want your headboard to be. A standard height is about 40 inches, but this can vary depending on your personal preference and the style you’re aiming for. Take precise measurements to ensure your headboard fits perfectly behind your bed.
- 3. Now, cut your plywood or MDF to the size you’ve determined, using your saw. If you’re not comfortable with power tools, consider asking a friend for help or having it cut at your local hardware store. Sand the edges to smooth them out and remove any splinters.
- 4. After cutting your base, prepare your foam padding. Cut the foam to the same size as your plywood or MDF, ensuring it’s evenly sized to provide a comfortable and sturdy base for your upholstery. You can use a utility knife or a saw specifically designed for cutting foam.
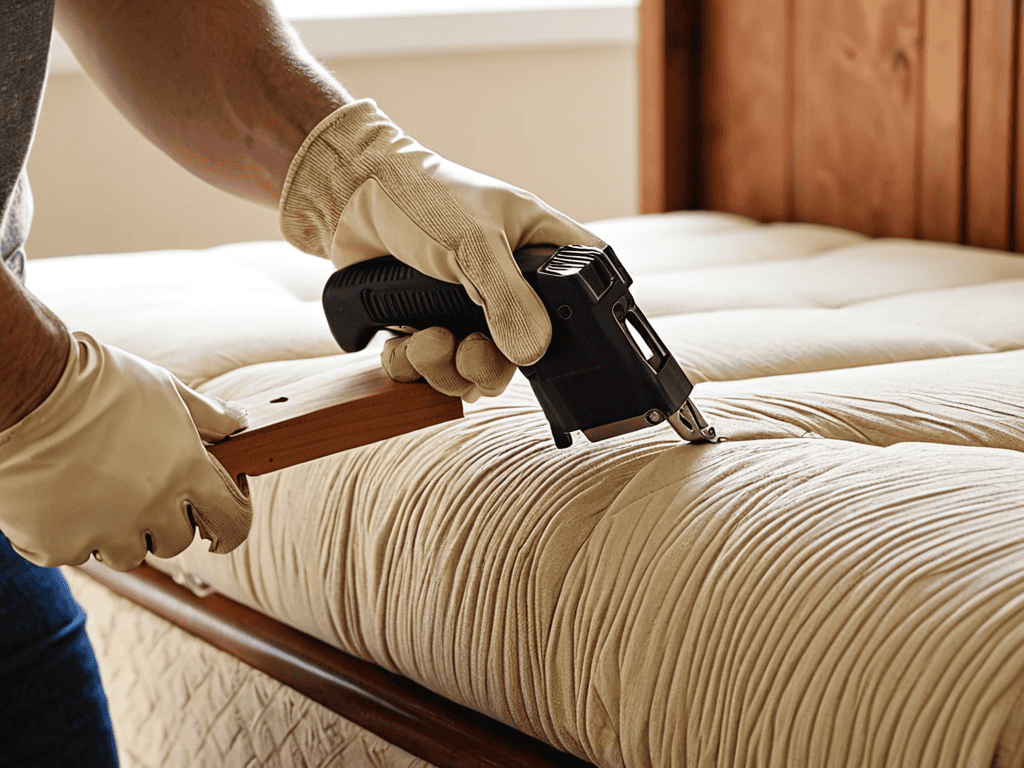
- 5. Then, attach the foam to the headboard base using your stapler. Start from the center and work your way outwards to avoid any wrinkles or bubbles in the foam. Make sure the foam is securely attached to provide a solid foundation for your upholstery fabric.
- 6. With your base ready, select and cut your upholstery fabric. Choose a fabric that complements your bedroom’s décor and is durable enough to withstand the wear and tear of daily use. Cut the fabric to a size that is slightly larger than your headboard base to allow for wrapping around the edges.
- 7. Next, apply the upholstery fabric to your headboard. Start by stapling the fabric to the back of the headboard, beginning from the center and working your way outwards. Pull the fabric tight to avoid any wrinkles or sagging, and make sure to staple it securely to the wood. Use a staple gun for this process, and consider using a helper to hold the fabric taut.
- 8. Finally, add any finishing touches, such as trimming excess fabric, adding decorative nails or staples, or attaching any additional features like buttons or a tufted design. Make sure all edges are secure and the fabric is smooth and evenly stretched. Stand back and admire your handiwork, feeling proud of the beautiful DIY upholstered headboard you’ve created.
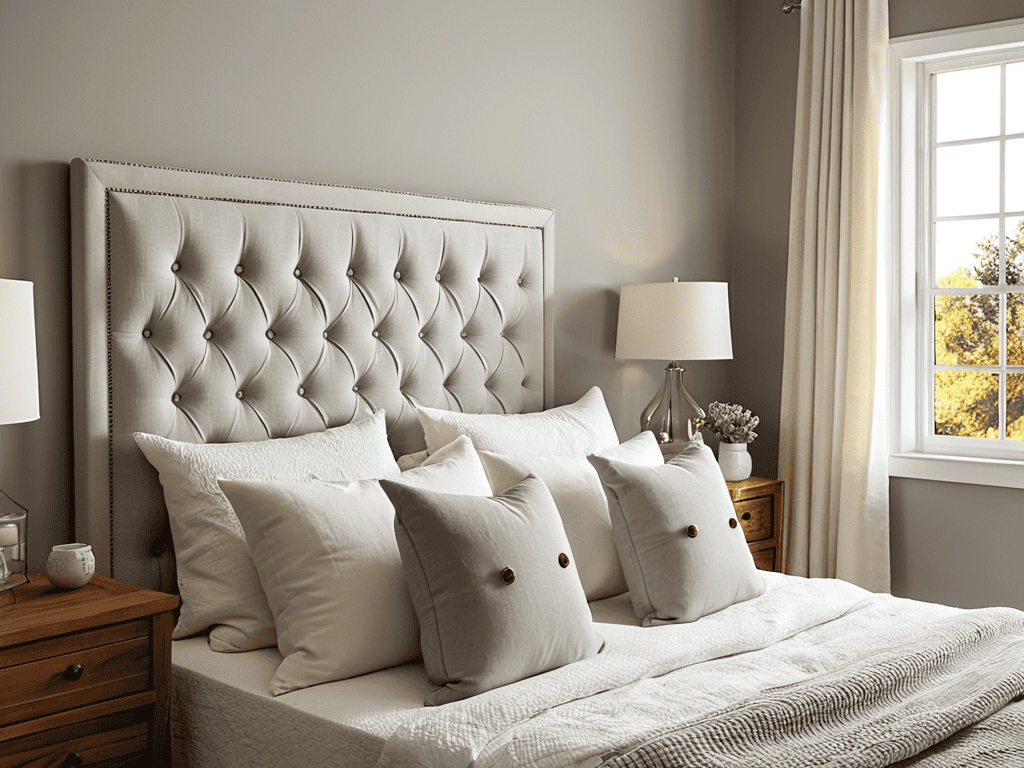
A Guide to Making a Diy Upholstered Headboard
When it comes to bringing your DIY headboard ideas to life, upholstery fabric for beginners can be a bit overwhelming. With so many patterns, textures, and colors to choose from, it’s essential to narrow down your options and select a fabric that complements your bedroom’s aesthetic. Consider the mood and atmosphere you want to create, and choose a fabric that reflects that.
In terms of headboard construction methods, there are a few things to keep in mind. Measuring your bed and bedroom space is crucial to ensure a custom fit. Take into account the size of your bed, as well as any obstructions, such as windows or doors. This will help you determine the ideal size and shape of your headboard.
For a truly unique touch, consider experimenting with tufting patterns for upholstery. This classic technique involves creating a series of buttons or stitches in a decorative pattern, adding depth and visual interest to your headboard. You can find plenty of upholstered headboard design inspiration online, or get creative and come up with your own unique design.
Exploring Diy Headboard Ideas on a Budget
Exploring DIY Headboard Ideas on a Budget
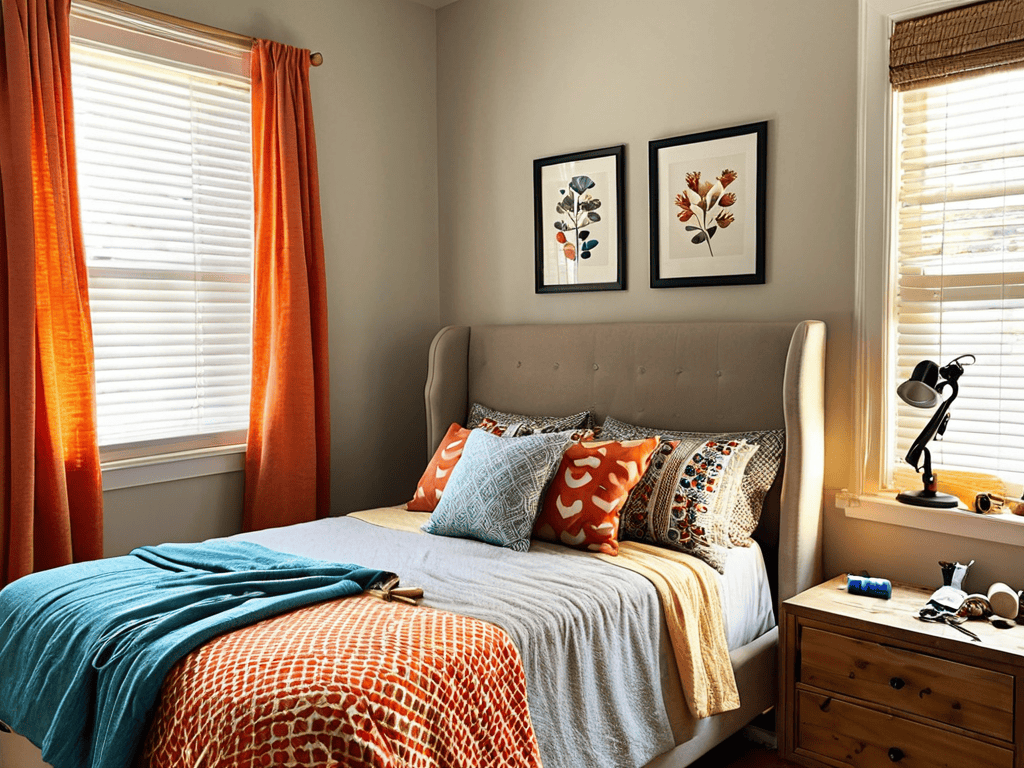
When it comes to creating a stunning DIY upholstered headboard without breaking the bank, getting creative with materials is key. Consider repurposing old furniture, like a vintage door or a wooden pallet, to add a unique touch to your bedroom. You can also scour thrift stores or flea markets for affordable fabric, foam, and other essentials. With a little imagination, you can craft a one-of-a-kind headboard that reflects your personal style without overspending.
By thinking outside the box and exploring budget-friendly options, you can achieve a high-end look at a fraction of the cost. Plus, the sense of accomplishment you’ll get from creating something with your own hands is priceless. So don’t be afraid to experiment and try new things – your wallet (and your bedroom) will thank you.
Mastering Upholstery Fabric for Beginners
When it comes to choosing the perfect upholstery fabric, beginners often feel overwhelmed by the vast array of options. To start, consider the style and theme of your bedroom – do you prefer modern and sleek, or traditional and elegant? Think about the color palette, texture, and pattern that will complement your existing furniture and decor. For a DIY upholstered headboard, you’ll want to select a fabric that’s durable, stain-resistant, and easy to work with.
As a beginner, it’s best to opt for a straightforward fabric like cotton, linen, or a cotton-poly blend. Avoid delicate or loose-weave fabrics that may be prone to snagging or fraying. You can also consider factors like fabric weight, thickness, and stretch to ensure a smooth, professional-looking finish. By selecting the right upholstery fabric, you’ll set yourself up for success and create a beautiful, one-of-a-kind headboard that reflects your personal style.
Nailing It: 5 Essential Tips for a DIY Upholstered Headboard
- Measure Twice, Cut Once: Double-Check Your Headboard Dimensions to Avoid Costly Mistakes
- Choose the Right Fabric: Consider Durability, Pattern, and Color to Match Your Bedroom Decor
- Pad It Up: Use High-Quality Foam and Batting to Ensure a Plush, Comfortable Headboard
- Get Creative with Upholstery: Experiment with Different Stitches, Tufting, and Trim to Add a Personal Touch
- Add the Finishing Touches: Install Your Headboard Securely and Add Any Final Decorative Elements, Like Buttons or Tassels
Key Takeaways for a Stunning DIY Upholstered Headboard
To create a gorgeous DIY upholstered headboard, start by exploring various design ideas that fit your budget and personal style, considering factors like fabric, frame, and embellishments
Mastering the basics of upholstery fabric is crucial, as it will greatly impact the final look and durability of your headboard – choose a fabric that is both aesthetically pleasing and practical for your needs
With patience, the right materials, and a step-by-step approach, you can successfully create a DIY upholstered headboard that not only elevates your bedroom’s decor but also reflects your unique taste and creativity
The Beauty of DIY
As you stitch and shape your DIY upholstered headboard, remember that it’s not just about the end result, but the journey of creation that makes your space truly yours.
Emily Wilson
Bringing Your DIY Vision to Life

As we wrap up this guide to making a DIY upholstered headboard, let’s take a moment to reflect on the journey. We’ve covered everything from exploring DIY headboard ideas on a budget to mastering upholstery fabric for beginners. By following these steps and tips, you’ve gained the knowledge and confidence to create a stunning piece of furniture that not only elevates your bedroom’s style but also showcases your personal touch. Remember, the key to a successful DIY project is patience, creativity, and a willingness to learn and experiment.
Now that you have the tools and inspiration to create your own DIY upholstered headboard, it’s time to unleash your inner DIY designer. Don’t be afraid to think outside the box, try new things, and make mistakes – they’re all part of the process. As you stand back to admire your finished headboard, you’ll feel an overwhelming sense of pride and accomplishment, knowing that you brought your vision to life with your own two hands. So go ahead, get creative, and make your bedroom a reflection of your unique style and personality.
Frequently Asked Questions
What are the most durable and easy-to-clean upholstery fabrics for a DIY headboard?
For a low-maintenance DIY headboard, consider durable fabrics like Microfiber, Faux Leather, or Crypton. These materials are stain-resistant, easy to wipe clean, and can withstand heavy use. Plus, they come in a variety of styles and patterns to fit your bedroom vibe.
How do I measure my bed to ensure a perfect fit for my DIY upholstered headboard?
To ensure a perfect fit, measure your bed’s width, including the mattress and any bed frames. Take note of the height from the floor to the top of the mattress, and consider the thickness of your headboard’s upholstery and frame. Double-check your measurements to avoid any errors – it’s better to be safe than sorry!
What are some creative ways to attach the upholstery to the headboard frame without using nails or staples?
For a nail- and staple-free approach, try using strong adhesive sprays or upholstery glue to secure your fabric to the headboard frame. You can also use decorative trim or ribbons to tie the fabric in place, adding a stylish touch to your DIY headboard.