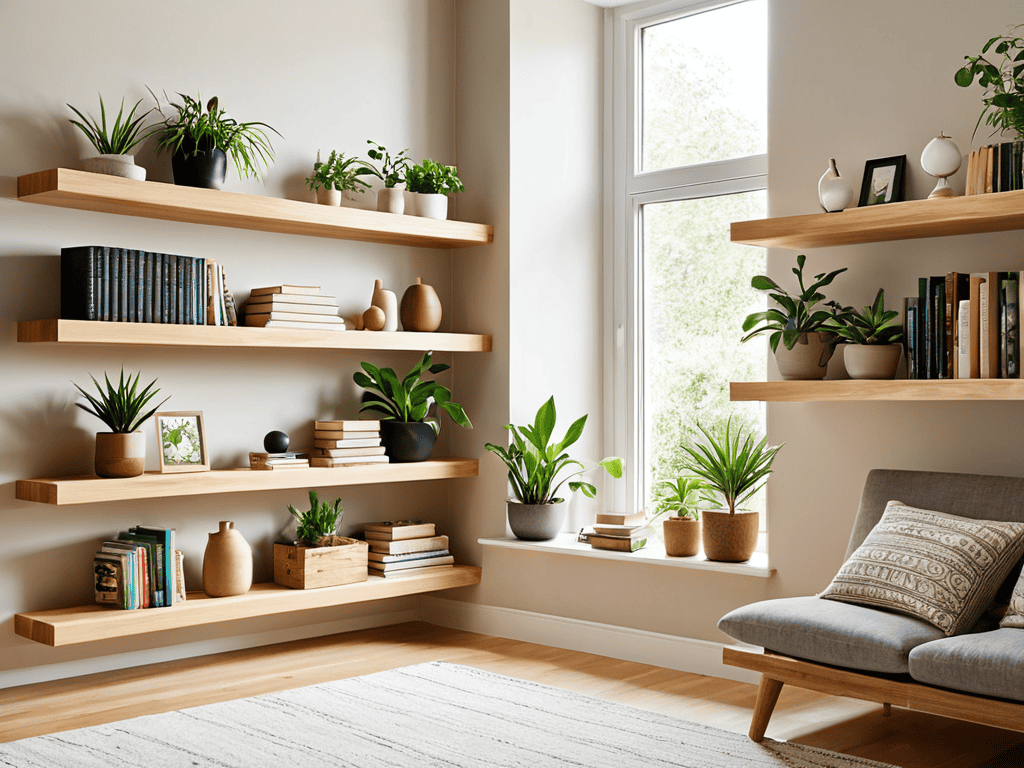
I still remember the first time I tried to install DIY Floating Shelves in my living room – it was a disaster. I had envisioned a sleek, modern look, but what I got was a wobbly, uneven mess. The problem was, I had fallen for the common myth that floating shelves are incredibly difficult to install, and that you need to be a skilled carpenter to get it right. But the truth is, with the right guidance and a bit of patience, anyone can create beautiful, sturdy DIY Floating Shelves that elevate their space.
In this article, I’ll walk you through the step-by-step process of crafting your own floating masterpieces. You’ll learn how to choose the right materials, design your shelves to fit your unique space, and install them with ease. I’ll share my own tips and tricks for avoiding common mistakes and achieving a professional-looking finish. By the end of this guide, you’ll be equipped with the knowledge and confidence to create your own stunning DIY Floating Shelves that will add a touch of elegance and sophistication to any room.
Table of Contents
Project Overview
Total Time: 2 hours 30 minutes
As you’re working on your DIY floating shelves project, you might find yourself wanting to add some extra flair to the room, perhaps with a statement piece of art or a unique decorative item. If you’re looking for some inspiration, I highly recommend checking out some online resources that showcase beautifully designed spaces, such as those found on websites that offer a glimpse into the world of home decor enthusiasts. For instance, you can visit sextreffen hamburg to explore their collection of stylish and modern interior design ideas, which might just spark the creativity you need to turn your living room into a stunning oasis.
Estimated Cost: $50 – $100
Difficulty Level: Intermediate
Tools Required
- Drill ((with screwdriver and drill bits))
- Level ((to ensure shelves are straight))
- Measuring Tape ((for accurate measurements))
- Utility Knife ((with extra blades))
- Saw ((circular or hand saw for cutting lumber))
- Sander ((optional, for smoothing out wood))
- Stud Finder ((to locate wall studs))
Supplies & Materials
- 2-in x 4-in lumber ((for shelf supports))
- 3/4-in plywood ((for shelf boards))
- Wall Anchors ((for securing shelves to wall))
- Screws ((2 inches or 2.5 inches long))
- Wood Glue ((for assembling shelves))
- Sandpaper ((for smoothing out wood))
- Paint or Stain ((optional, for finishing shelves))
- Decorative Trim ((optional, for covering edges))
Step-by-Step Instructions
- 1. First, let’s start by gathering our materials, which include wooden boards for the shelves, wall anchors, a drill, a level, and a measuring tape. Make sure you have all the necessary tools and materials before you begin to avoid any last-minute trips to the hardware store.
- 2. Next, determine the wall type you’re working with, as this will affect the type of wall anchors you’ll need. If you have drywall, you’ll need anchors that can spread out once they’re screwed in to provide a solid hold. For concrete or brick walls, you’ll need anchors that are specifically designed for these materials.
- 3. Now, measure your space carefully to decide how many shelves you can fit and how long they should be. Consider the items you plan to place on the shelves and leave enough space between them for easy access. Use your measuring tape to mark the wall where you want the shelves to go.
- 4. With your measurements in hand, cut your wooden boards to the desired length. Use a saw or a wood cutter, depending on the type of wood and the tools you have available. Sand the cut edges to smooth them out and remove any splinters.
- 5. To ensure your shelves are level and secure, use a level to draw a straight line along the wall where you marked your shelf position. Then, drill pilot holes for your wall anchors, making sure they’re evenly spaced to support the weight of the shelf and its contents.
- 6. Insert your wall anchors into the pilot holes and screw them into place. Then, place your shelf board onto the anchors, making sure it’s aligned with the marks you made earlier. Use screws to secure the shelf to the anchors, tightening them firmly but avoiding overtightening.
- 7. Finally, add a finish to your shelves if desired, such as staining or painting them to match your room’s decor. Allow the finish to dry completely before placing any items on your new shelves. Stand back and admire your handiwork, feeling proud of your DIY accomplishment.
Diy Floating Shelves
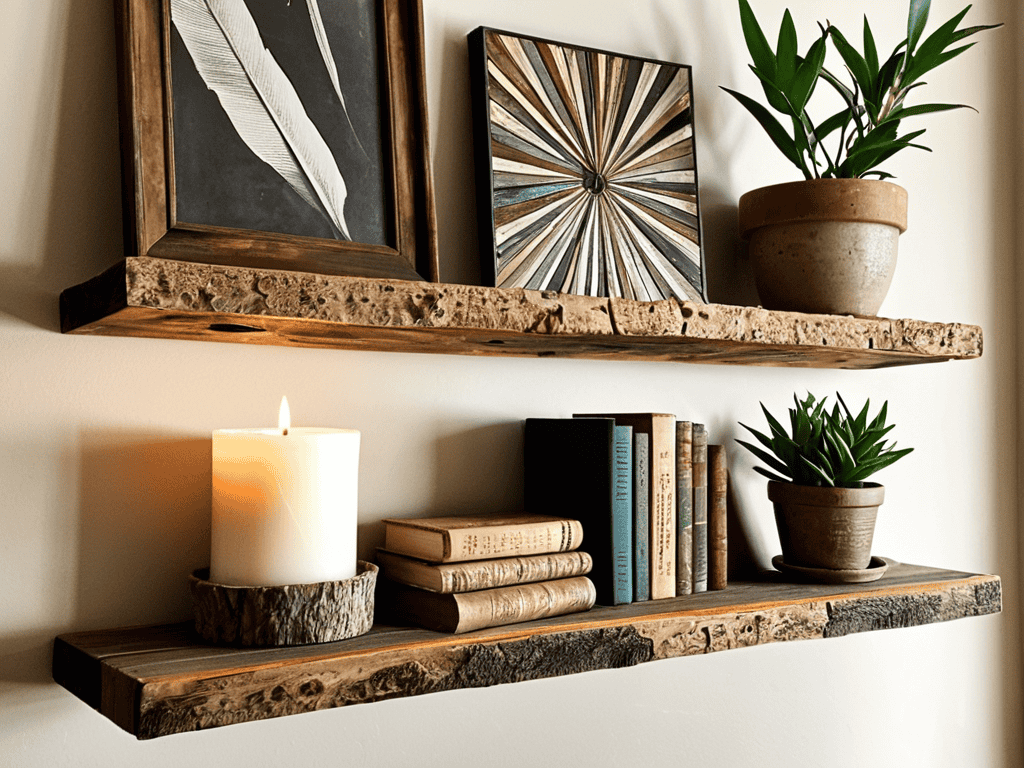
When it comes to adding a personal touch to your reclaimed wood shelf ideas, consider the type of wood you’re using and the overall aesthetic you want to achieve. For a more rustic wall decor inspiration, you can distress the wood or add a vintage finish. This will not only give your shelves a unique character but also make them stand out in your living room.
To ensure a sturdy and secure installation, pay attention to the hidden bracket installation tips. Make sure to drill into the wall studs and use the correct type of screws to avoid any damage or collapse. This is especially important if you’re planning to store heavy items on your shelves. By following these tips, you can create a safe and functional storage solution that also adds to the overall beauty of your room.
For those who are new to woodworking, this project can be a great introduction to woodworking projects for beginners. With some patience and practice, you can create your own floating shelf design plans and bring them to life. Remember to measure carefully and take your time when assembling the shelves to ensure a professional-looking finish.
Hidden Bracket Installation Tips
When it comes to creating a seamless look, hidden bracket installation is key. To ensure a sturdy and sleek finish, make sure to drill pilot holes for the screws to avoid splitting the wood. It’s also essential to use a level to guarantee the shelf is perfectly straight.
Properly securing the brackets to the wall is crucial, so choose the right type of anchor for your wall type. For example, use drywall anchors for hollow walls or molly bolts for solid walls. This will provide a stable base for your floating shelf, allowing you to enjoy your new rustic wall decor without worrying about it coming crashing down.
Rustic Wall Decor Inspiration
To add a touch of warmth and character to your space, consider pairing your DIY floating shelves with rustic wall decor. Reclaimed wood, vintage metal signs, and natural textiles like burlap or linen can create a cozy atmosphere. You can also hang earthy-toned macrame wall hangings or a statement piece of artwork to bring in a organic feel.
By combining your floating shelves with these rustic elements, you can create a unique and inviting space that reflects your personal style. The contrast between the sleek, modern lines of the shelves and the distressed, vintage charm of the decor can add depth and visual interest to your walls.
Elevate Your Space: 5 Essential Tips for DIY Floating Shelves

- Choose the Right Wood: Select a wood type that fits your desired aesthetic, from modern plywood to rustic reclaimed wood, to ensure your shelves blend seamlessly with your home decor
- Measure Twice, Drill Once: Double-check your wall measurements and shelf placement to avoid costly mistakes and ensure a sturdy installation
- Optimize Your Bracket Game: Use high-quality, hidden brackets to create a sleek, floating effect, and make sure to follow the manufacturer’s instructions for a secure fit
- Add a Personal Touch: Incorporate decorative trim, paint, or stain to match your shelves with your existing furniture and give your space a cohesive look
- Light It Up: Consider adding LED strip lights or fairy lights under your shelves to create a warm ambiance and highlight your favorite decorative pieces
Key Takeaways for Your DIY Floating Shelves Project
To achieve a professional finish, ensure your walls are level and your shelves are evenly spaced, considering the weight and size of the items you plan to display
Choose the right materials and hardware for your DIY floating shelves, such as solid wood or MDF for the shelves and hidden brackets that can support the weight of your decorative items
Don’t be afraid to add your personal touch and style to your floating shelves, whether through rustic wall decor inspiration or unique bracket installation techniques, to make your DIY project truly stand out
The Beauty of DIY
There’s something undeniably satisfying about watching a blank wall transform into a stunning display of personal style, and for me, DIY floating shelves will always be the perfect blend of form and function.
Emily Wilson
Conclusion
As we’ve explored the world of DIY floating shelves, it’s clear that with the right tools and a bit of patience, you can create beautiful and functional pieces for your home. From the initial planning to the final installation, each step is crucial in bringing your vision to life. Whether you’re aiming for a rustic look with hidden bracket installations or seeking inspiration from various decor styles, the key to success lies in attention to detail and a willingness to get creative.
So, as you put down your tools and step back to admire your handiwork, remember that the true beauty of DIY lies not just in the end result, but in the journey itself. The process of creating something with your own hands is incredibly rewarding, and it’s a feeling that will stay with you long after your DIY floating shelves are filled with your favorite decorations and treasures. Embrace the journey, and don’t be afraid to experiment and try new things – it’s all part of the fun.
Frequently Asked Questions
What type of wood is best suited for building DIY floating shelves?
For a stunning look, I recommend using solid woods like oak, maple, or walnut for your DIY floating shelves. These woods offer a beautiful grain pattern and can add a touch of warmth to your space. If you’re on a budget, consider pine or fir, but keep in mind they might require more finishing work.
How do I determine the optimal shelf depth and length for my specific wall space?
To determine the perfect shelf depth and length, measure your wall space and consider the items you’ll be displaying. A good rule of thumb is to leave about 3-5 inches between shelves and 1-2 inches between the shelf and the wall. For length, choose a size that leaves some negative space to avoid a cluttered look.
Can I use DIY floating shelves to support heavy objects, such as books or decorative items?
While DIY floating shelves can support some weight, they’re not ideal for heavy objects like books or large decorative items. It’s essential to consider the weight limit of your shelves and the type of brackets you’re using to ensure they can handle the load safely.