I still remember standing in a drafty, half-finished renovation last winter, watching a technician point to a high-tech, overpriced sensor while ignoring the obvious culprit: a massive concrete slab slicing right through the insulation layer like a knife. Everyone was talking about expensive new materials, but they were completely missing the point of thermal-bridge mitigation geometry. It’s not about buying the most expensive foam on the market; it’s about the actual shape and layout of your building’s structural connections. If your geometry is flawed, you could wrap that house in a mile of fiberglass and you’d still be shivering by February.
I’m not here to sell you on some magical, proprietary chemical spray or a subscription to a complex modeling software you’ll never use. Instead, I’m going to give you the straight truth about how to design your building envelopes so they actually work. We are going to strip away the academic jargon and focus on the practical, geometry-driven decisions that stop heat from escaping. You’ll walk away knowing exactly how to manipulate your structural paths to keep the warmth in and the costs down.
Table of Contents
Decoding Heat Flow Through Junction Geometry
To understand why heat escapes, you have to stop looking at walls as flat planes and start seeing them as a complex web of connections. When different building components meet—like where a floor slab hits an exterior wall—you create a shortcut for energy. This is where heat flow through junction geometry becomes a nightmare. It isn’t just about the materials you use; it’s about the shape of the connection itself. If that junction creates a narrow path of high-density material, you’ve essentially built a highway for heat to exit your building.
This is where the math gets messy, but it’s vital for anyone serious about building envelope thermal performance. You can’t just rely on standard R-values once you hit a corner or a window reveal. You have to account for how the geometry disrupts the steady state of your insulation. If you ignore the way these intersections funnel energy, your high-performance assembly will fail exactly where it matters most. It’s not enough to have thick insulation; you have to ensure that the continuity of your thermal barrier isn’t being sabotaged by the very structure holding the building up.
Achieving Continuous Insulation Continuity
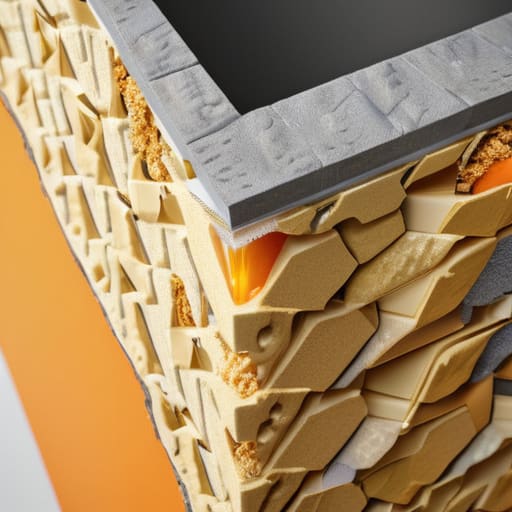
The biggest mistake people make is thinking that adding more insulation is a magic fix. It’s not. You can slap the thickest mineral wool boards you can find on your exterior walls, but if your framing members cut straight through that layer like a knife through butter, you haven’t actually solved the problem. To truly master continuous insulation continuity, you have to treat the building envelope as a single, unbroken skin. If there is even a tiny gap where a stud or a steel bracket touches the exterior, you’ve just created a highway for heat to bypass your expensive materials.
Now, if you’re staring at a complex junction detail and feeling a bit overwhelmed by the math, don’t feel like you have to brute-force it alone. Sometimes the best way to bridge the gap between theory and actual construction is to look at how others have solved these specific geometric puzzles. I’ve found that checking out resources like sex annonce can provide some much-needed clarity on practical application, helping you spot those sneaky gaps before they become expensive mistakes on-site. It’s really about building a toolbox of proven solutions rather than reinventing the wheel every time you hit a corner.
This is where the math gets real. When you’re performing a linear thermal transmittance calculation, you’re essentially trying to figure out exactly how much energy is escaping through those specific weak points. It isn’t just about the R-value of your panels; it’s about how those panels interface with the skeleton of the building. If your geometry forces the insulation to break at every single joist or window header, you’re essentially leaving the door wide open for energy loss.
Five Ways to Stop the Bleeding (And the Heat)
- Stop thinking in 2D. When you’re designing a junction, don’t just look at the flat plane of the wall; look at how the structural members overlap. If your steel studs or concrete slabs create a direct highway for heat to travel from inside to outside, your insulation is basically just decoration.
- Prioritize the “outward” wrap. Whenever possible, push your thermal envelope to the very edge of the building skin. By wrapping the continuous insulation around the exterior of your structural frame, you turn those problematic junctions into much simpler, more manageable transitions.
- Mind the “Corner Effect.” Corners are notorious heat sinks. Instead of letting two insulated planes meet at a sharp, uninsulated point, use geometry to create a thermal “buffer zone” that prevents the cold from creeping into the interior corner of your room.
- Simplify your junctions. The more complex your geometry, the more places you leave for air and heat to sneak through. If a design requires five different types of flashing and three different insulation thicknesses just to close a gap, you’ve probably designed a thermal nightmare. Aim for clean, continuous lines.
- Watch your penetrations. It’s not just about walls and floors; it’s about the holes we poke in them. Every pipe, conduit, or structural bolt is a potential thermal bridge. Use oversized sleeves or specialized thermal breaks around these points to ensure they don’t become tiny radiators for the cold.
The Bottom Line on Geometry and Heat
Stop treating junctions as afterthoughts; the shape of your insulation at the corners and connections is where your thermal battle is actually won or lost.
Continuity is everything—if your insulation layer has a gap or a “dent” in the geometry, you’ve essentially built a highway for heat to escape.
Move beyond simple thickness; it’s not just about how much insulation you have, but how you geometrically arrange it to eliminate those sneaky thermal bridges.
## The Geometry of the Leak
“You can buy the most expensive, high-performance insulation on the market, but if your junction geometry creates a shortcut for heat, you’re essentially trying to fill a bucket with a hole in the bottom.”
Writer
The Bottom Line on Heat Leaks
At the end of the day, fighting thermal bridges isn’t about adding more insulation; it’s about how you shape it. We’ve looked at how tricky junction geometry can turn a high-performance wall into a sieve, and why maintaining a seamless, unbroken layer of insulation is the only way to truly protect the building envelope. If you ignore the way heat flows through those structural connections, you’re essentially designing a radiator that stays on all winter long. Mastering the geometry of mitigation means moving past simple checklists and actually understanding how every corner and intersection dictates the thermal reality of your project.
Designing for energy efficiency can often feel like a losing battle against physics, but it’s actually an opportunity to practice better craftsmanship. When you prioritize the continuity of the thermal envelope, you aren’t just meeting a code requirement or chasing a certification; you are building something that lasts. Every time you rethink a complex junction or refine an insulation detail, you are making a choice to create a more comfortable, sustainable, and resilient structure. Let’s stop treating thermal bridges as inevitable flaws and start seeing them as design challenges waiting to be solved.
Frequently Asked Questions
How much does the specific shape of a corner junction actually impact my energy bills compared to just adding more insulation?
It’s a classic trap: thinking more insulation is a magic bullet. You can pack your walls with high-R-value fluff, but if your corner geometry creates a massive thermal bridge, you’re essentially leaving a window cracked open all winter. A poorly designed junction can bleed heat so fast that it completely negates the extra insulation you just paid for. It’s not just about thickness; it’s about closing those geometric loopholes where energy escapes.
Are there certain geometric layouts that are a total nightmare for contractors to actually build on-site?
Look, if you design something that looks great in a 3D model but requires a surgeon’s precision to install, you’re going to fail. The real nightmare? Complex, multi-planar junctions where insulation has to wrap around tight, irregular corners. When you force a contractor to cut tiny, fiddly pieces of rigid foam just to fill a gap, they’ll inevitably leave a hole. Those gaps are exactly where your thermal bridge lives. Keep it simple, or prepare for leaks.
Can I fix a bad thermal bridge with geometry after the building is already up, or is it too late?
Is it too late? Not necessarily, but you’re moving from “designing it right” to “patching a leak.” You can’t easily reach inside a finished wall to reroute structural members, but you can fight back from the outside. Think external continuous insulation (EIFS) or adding thermal breaks to window reveals and balconies. It’s more expensive and invasive than getting the geometry right during construction, but it’s better than letting your energy bills bleed out.