I still remember my first flight as a bush pilot in Alaska, navigating through dense fog with nothing but my trusty six pack flight instruments to guide me. It was a daunting experience, but one that taught me the importance of understanding these essential tools. As a flight instructor, I’ve seen many students struggle to grasp the basics of a guide to the basic six pack flight instruments, often overwhelmed by the sheer amount of information. But I’m here to tell you that it doesn’t have to be that way – with a clear and concise approach, you can master these instruments and become a more confident pilot.
In this article, I’ll share my personal experience and expertise to provide you with a straightforward a guide to the basic six pack flight instruments. You’ll learn how to read and understand each instrument, from the attitude indicator to the turn coordinator, and how to apply this knowledge in real-world flying scenarios. My goal is to break down the complexity of these instruments into simple, easy-to-follow steps, so you can focus on what really matters – safe and enjoyable flying. By the end of this guide, you’ll have a solid foundation in the basic six pack flight instruments and be well on your way to becoming a proficient pilot.
Table of Contents
- Guide Overview: What You'll Need
- Step-by-Step Instructions
- A Guide to Basic Six Pack
- 5 Essential Tips for Mastering the Basic Six Pack Flight Instruments
- Key Takeaways from Our Ground School Session
- Flying with Clarity
- Conclusion: Mastering the Basics of Flight Instruments
- Frequently Asked Questions
Guide Overview: What You'll Need

Total Time: 1 hour 15 minutes
Estimated Cost: $50 – $100
Difficulty Level: Intermediate
Tools Required
- Ruler (for measuring 6 inches)
- Pencil (for marking instrument locations)
- Drill Press (for precise drilling)
- Level (for ensuring proper alignment)
- Screwdriver (for securing instruments)
- Wrench (for tightening bolts)
Supplies & Materials
- Airspeed Indicator
- Altimeter
- Heading Indicator
- Turn Coordinator
- Vertical Speed Indicator
- Magnetic Compass
Step-by-Step Instructions
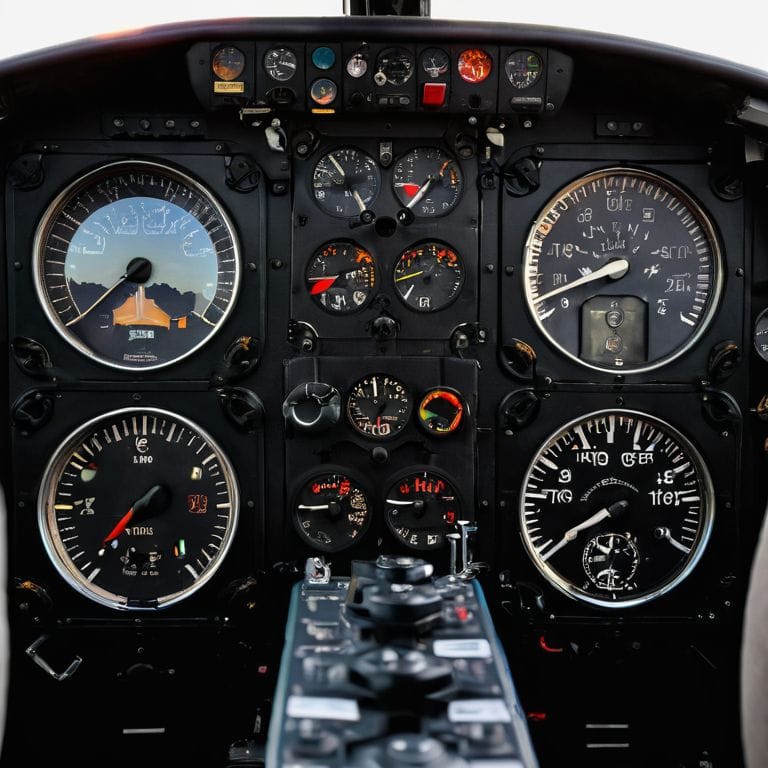
- 1. First, let’s start by understanding what the six pack flight instruments are and why they’re crucial for safe flight operations. These instruments provide the pilot with essential information about the aircraft’s attitude, altitude, airspeed, and direction. Think of them as the backbone of your aircraft’s cockpit, helping you navigate through various flight conditions.
- 2. To begin, we need to identify each of the six pack instruments and their functions. These include the air speed indicator, altimeter, heading indicator, turn coordinator, pitch indicator, and the gyrocompass. Don’t worry if these terms seem unfamiliar; we’ll break each one down in detail as we progress through this guide.
- 3. Next, let’s focus on the air speed indicator, which shows the aircraft’s speed through the air. This instrument is critical for maintaining a safe speed during various phases of flight, such as takeoff, landing, and cruising. Understanding how to read this indicator will help you avoid stall or excessive speeds that could compromise the safety of your flight.
- 4. Now, let’s move on to the altimeter, which indicates the aircraft’s altitude above sea level. This instrument is vital for navigating through different altitudes and ensuring you maintain a safe distance from obstacles and other aircraft. Remember, altitude is a critical factor in flight planning, and accurate readings can make all the difference in a successful flight.
- 5. The heading indicator, also known as the directional gyro, shows the aircraft’s magnetic heading. This instrument helps you stay on course and maintain direction, which is essential for navigation. By understanding how to use the heading indicator in conjunction with other instruments, you’ll be able to plot a precise course and stay on track.
- 6. The turn coordinator, also known as the turn and slip indicator, helps the pilot maintain a steady turn and avoid skidding or slipping. This instrument is crucial for making smooth, controlled turns, especially during critical phases of flight such as landing. By mastering the use of the turn coordinator, you’ll be able to execute flawless turns and maintain complete control of your aircraft.
- 7. Finally, let’s discuss the pitch indicator, also known as the attitude indicator, which shows the aircraft’s pitch and bank angle. This instrument is vital for maintaining control of the aircraft during takeoff, landing, and other critical phases of flight. By understanding how to read the pitch indicator, you’ll be able to make precise adjustments to your aircraft’s attitude and ensure a safe, successful flight.
A Guide to Basic Six Pack

As we delve deeper into the world of flight instruments, it’s essential to understand the primary flight display systems that modern aircraft employ. These systems provide a wealth of information to the pilot, making it easier to navigate and control the aircraft. In traditional aircraft, the six pack instrument panel layout is still widely used, and understanding its components is crucial for safe flight operations.
When it comes to basic flight instrument training, it’s not just about reading the dials and needles. It’s about understanding the story they tell together. By recognizing patterns and relationships between the instruments, pilots can develop a deeper understanding of their aircraft’s performance and make more informed decisions. For instance, the relationship between the altimeter and the vertical speed indicator can provide valuable insights into the aircraft’s climb or descent rate.
In addition to the traditional six pack, many modern aircraft are now equipped with glass cockpit instrumentation. These systems offer a range of benefits, including improved readability and reduced pilot workload. However, they also require a different set of skills and knowledge to operate effectively. As a flight instructor, I always emphasize the importance of understanding the aircraft instrument system design and how it relates to the overall performance of the aircraft. By doing so, pilots can develop a more nuanced understanding of their aircraft and become more confident and competent flyers.
Mastering Glass Cockpit Instrumentation
Now that we’ve covered the primary flight displays, let’s dive into mastering glass cockpit instrumentation. This is where modern aviation meets traditional flying skills. I like to think of it as navigating through changing weather conditions – you need to be aware of your surroundings and adjust accordingly. In a glass cockpit, you’ll find digital displays that provide a wealth of information, from altitude and airspeed to navigation and engine performance.
As you become more comfortable with these digital instruments, you’ll start to appreciate the benefits of streamlined data and reduced pilot workload. Think of it like flying through a clear sky – you can see everything you need to, and you can focus on the journey ahead. By mastering glass cockpit instrumentation, you’ll be able to make more informed decisions and react to changing situations with confidence.
Unlocking Primary Flight Displays
Unlocking Primary Flight Displays is all about understanding the core instruments that help you navigate the skies. Let’s start with the Attitude Indicator, also known as the artificial horizon. This instrument shows you the aircraft’s orientation relative to the ground, helping you maintain control during takeoff, landing, and flight. Next, we have the Heading Indicator, which displays the aircraft’s direction. By combining these two instruments, you’ll gain a solid foundation for navigating through various weather conditions.
Think of it like planning a backcountry hike – you need to know your direction and terrain to stay on track. Similarly, in flight, these primary displays give you the essential information to make informed decisions and ensure a safe journey. By mastering these instruments, you’ll become a more confident pilot, ready to tackle any flight scenario that comes your way.
5 Essential Tips for Mastering the Basic Six Pack Flight Instruments

- Understand the Role of Each Instrument: Start by learning what each of the six pack instruments does, from the airspeed indicator to the altimeter, and how they work together to give you a complete picture of your flight
- Practice Reading the Instruments: The more you practice reading the instruments, the more second-nature it will become – try quizzing yourself or a friend on what each instrument is telling you
- Focus on Cross-Checking: Don’t rely on just one instrument – learn to cross-check between them to get a complete understanding of your flight, just like you would use multiple navigation aids to stay on course
- Stay Oriented with the Heading Indicator: The heading indicator is one of the most important instruments in the six pack – make sure you understand how to use it to stay oriented and on course, even in changing weather conditions
- Use Real-World Scenarios to Reinforce Your Learning: Try practicing scenarios like takeoffs, landings, and emergency procedures to reinforce your understanding of the six pack instruments and how to use them in real-world situations
Key Takeaways from Our Ground School Session
Understanding the basic six pack flight instruments is crucial for becoming a confident pilot, as they provide vital information on the aircraft’s attitude, altitude, and airspeed
Mastering primary flight displays and glass cockpit instrumentation can seem overwhelming, but breaking it down into simple, manageable steps can make all the difference in your flight training
By applying the principles of flight instrumentation to everyday decision-making, you’ll not only become a better pilot, but also develop a more methodical approach to problem-solving, much like navigating through challenging weather conditions
Flying with Clarity
The basic six pack flight instruments are not just dials on a panel, they’re the keys to unlocking a deeper understanding of your aircraft and the skies you fly in – with practice and patience, you’ll learn to read them like a second language, and that’s when the real magic of flight begins.
Daniel Sato
Conclusion: Mastering the Basics of Flight Instruments
As we conclude this guide to the basic six pack flight instruments, let’s take a moment to summarize the key points we’ve covered. We started by introducing the primary flight displays, then dove deeper into unlocking their secrets. We also explored the world of glass cockpit instrumentation, and I hope you now feel more confident in your ability to master these complex tools. By following the step-by-step instructions and practicing what you’ve learned, you’ll be well on your way to becoming a skilled pilot. Remember, the journey to mastering flight instruments is a lifelong process, and it’s essential to stay focused and committed to your goals.
As you continue on your journey to becoming a proficient pilot, I want to leave you with a final thought: the sky is no longer the limit. With the right knowledge and skills, you can soar to new heights and achieve your dreams. Don’t be afraid to push beyond your comfort zone and challenge yourself to learn more. With persistence and dedication, you’ll be able to navigate even the most complex flight scenarios with ease. So, buckle up, stay safe, and remember to always keep your eyes on the horizon.
Frequently Asked Questions
What are the key differences between traditional analog six pack instruments and modern glass cockpit displays?
Let’s compare traditional analog six pack instruments to modern glass cockpit displays. The main difference lies in how they present information. Analog instruments use physical dials and needles, while glass cockpits display data digitally on screens. This change affects how pilots process information, with glass cockpits often providing more data at a glance, but requiring a different set of skills to interpret correctly.
How do pilots prioritize which six pack instruments to focus on during emergency procedures?
During emergency procedures, pilots prioritize the six pack instruments by focusing on the most critical ones first, such as the altimeter and airspeed indicator. I like to use the “aviate, navigate, communicate” checklist to help students remember what to focus on. By prioritizing the essential instruments, pilots can quickly assess the situation and take control.
Can the basic six pack flight instruments be used in conjunction with other navigation tools for enhanced situational awareness?
Absolutely, combining the basic six pack with other navigation tools can significantly enhance situational awareness. I like to think of it as layering maps on a flight plan – each tool builds on the other, giving you a clearer picture of your surroundings. Let’s explore how to integrate these tools for safer, more informed flying.