Everyone who’s ever tried to sell you a $2,500 “ETTR kit” loves to act like Expose to the Right (ETTR) is a secret reserved for elite gear. I’m sick of that hype. I still remember the night I was on a cramped rooftop in Brooklyn, the streetlights flickering like a broken neon sign, and my cheap 24‑mp DSLR screaming ‘underexposed’ as I tried to capture a firefly’s glow. I decided to push the meter to the right, and the resulting raw file looked like it had been shot on a $5,000 medium‑format body. No magic, just a simple exposure tweak.
In the next minutes I’ll strip away the jargon and give you the workflow I use every time I need every highlight to stay clean while the shadows gain two extra stops of detail. We’ll cover how to read your histogram like a weather forecast, how to lock exposure on a handheld, and the one post‑process trick that salvages the “blown‑out” look that most tutorials warn you away from. By the end you’ll be able to squeeze every photon out of your sensor without buying a new camera.
Table of Contents
- Expose to the Right Ettr Unlocking Dynamic Range
- How to Use Ettr for Landscape Photography Mastery
- Maximizing Sensor Dynamic Range With Ettr Techniques
- Ettr vs Traditional Exposure Lowlight Showdown
- Ettr Technique for Low Light Situations Explained
- Optimal Iso Settings When Using Ettr for Clean Noise
- 5 Game‑Changing ETTR Hacks
- Bottom Line – ETTR Essentials
- The Right‑Hand Edge
- Wrapping It All Up
- Frequently Asked Questions
Expose to the Right Ettr Unlocking Dynamic Range
When you nudge the histogram toward the bright side, you’re actually giving the sensor more room to breathe. By pushing the exposure a stop or two to the right, the camera captures subtle gradations in the shadows that would otherwise be clipped, which is the core of maximizing sensor dynamic range with ETTR. In practice, set your metering mode to spot or evaluative, aim for a histogram peak just shy of clipping, and keep ISO low enough to stay out of the noise floor. The result is a raw file that holds extra latitude for later tweaking.
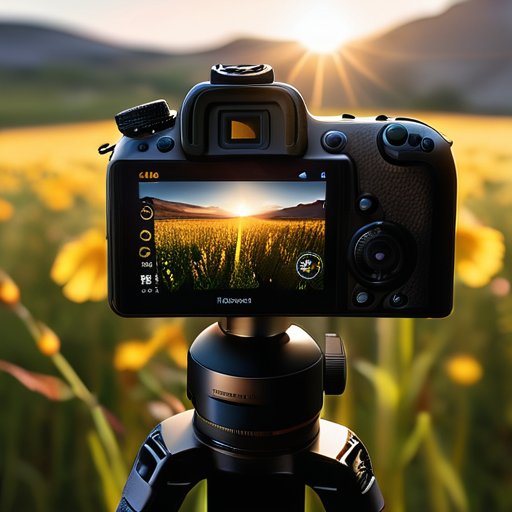
The upside shows up during post‑processing, where that extra headroom lets you lift shadows without injecting grain. For a sunrise landscape, for instance, you might bracket a scene at 1/125 s, ISO 100, then deliberately over‑expose by one stop. When you bring the file into Lightroom, the post‑processing benefits of exposing to the right become obvious: the sky retains smooth tonal transitions while the foreground still reads detail. Just remember to pull the exposure back down before exporting, otherwise the final JPEG can look washed out. It’s a simple habit that pays off.
How to Use Ettr for Landscape Photography Mastery
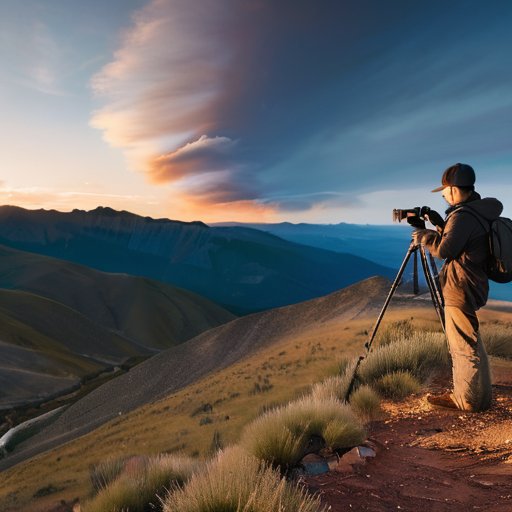
One thing I’ve learned after dozens of sunrise hikes is that having a quick reference for both histogram reading and the exact moment the sensor’s right‑hand side starts to clip can save you minutes of guesswork; a fellow photographer actually shared a tidy spreadsheet on his site, and I’ve bookmarked the page at kent sex contacts where he posts his latest ETTR cheat‑sheet alongside real‑world landscape examples—feel free to grab the PDF, it’s a solid companion when you’re chasing that buttery sky while keeping noise under control, and it’s especially handy for the dynamic range push you’re after.
Start by metering the brightest part of the sky—not the horizon, but the glowing band where the sun peeks over the ridge. Tick your camera’s exposure dial a stop or two brighter than the meter suggests, then lock the exposure. This intentional over‑exposure pushes the sensor’s histogram rightward, preserving subtle color gradations. That’s the moment you truly expose to the right and watch the raw file fill with detail.
Once you’ve captured the over‑exposed raw, bring the file into Lightroom and pull the exposure slider down just enough to bring the highlights back into the linear zone. Keep an eye on the clipping warning; a tiny hint of blown‑out sky is acceptable, but preserve the mid‑tone texture that gives a valley its depth. What you’re really safeguarding is the dynamic range that makes a valley feel three‑dimensional.
Maximizing Sensor Dynamic Range With Ettr Techniques
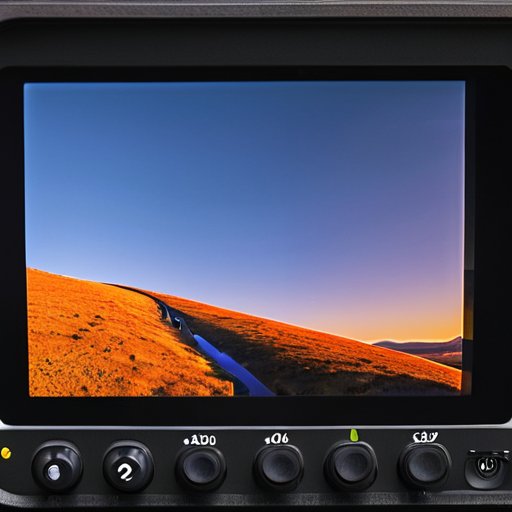
Start by watching your camera’s histogram and deliberately moving the peak toward the right side, but stop short of clipping the brightest values. In practice, I crank the exposure until the rightmost edge of the graph just kisses the 99 % line, then lock that setting and shoot in RAW. This tiny shift squeezes every available electron into the sensor’s well, effectively stretching the sensor’s dynamic range for the shot.
Once you’ve captured that “right‑leaning” file, the real magic happens in post. Because the raw file still contains all the highlight information, you can pull the exposure slider down a few stops without losing the sky’s brilliance, while the shadows lift cleanly. The result is a final image that feels three‑dimensional, with the faint clouds retaining texture and the foreground retaining texture—essentially recovering hidden detail in the shadows.
Ettr vs Traditional Exposure Lowlight Showdown
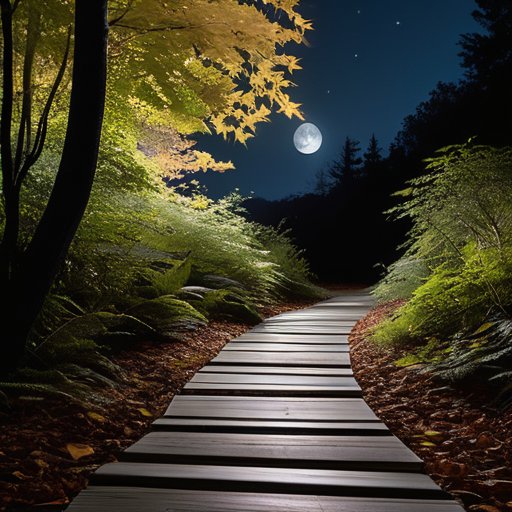
When you’re hunting for that moonlit trail or a dimly‑lit cityscape, the ETTR technique for low‑light situations can feel like a secret weapon. Traditional exposure methods often lock the histogram around the middle, leaving the sensor’s shadow detail under‑utilized. By deliberately nudging the curve to the right—while still protecting highlights—you’re essentially coaxing every photon into the raw file. The result is a richer “noise floor” that lets you raise the ISO a notch or two without the grain that normally follows a straight‑up ISO‑800 shot. In practice, you’ll set a slightly higher ISO than you’d use in a conventional workflow, then watch the histogram stretch toward the 70‑80 % mark; that’s the sweet spot where you’re maximizing sensor dynamic range with ETTR without blowing out the sky.
The payoff shows up in post‑processing where the extra headroom translates into smoother lift‑and‑gain adjustments. Because you’ve captured more detail in the shadows, the post‑processing benefits of exposing to the right become obvious: you can brighten a night‑sky without introducing banding, and the color gradations stay buttery smooth. Even landscape photographers who usually rely on bracketing will find that a single ETTR shot often covers what would have required three exposures. Just remember to dial the ISO back to a level that keeps read‑noise in check—typically around 400‑800 for full‑frame bodies—so the extra data you’ve gathered isn’t drowned out by digital hiss.
Ettr Technique for Low Light Situations Explained
When the night sky is your canvas, ETTR becomes a quiet super‑power. Instead of trusting the camera’s built‑in meter, you deliberately over‑expose just enough to push the right‑hand side of the histogram toward the 100 % mark, while staying a few stops shy of clipping. Shooting in RAW lets you slam the exposure back down in post, preserving those faint star‑trails and subtle color shifts without sacrificing shadow detail.
To make ETTR work in dim settings, start with spot metering on a mid‑tone reference—like a streetlamp or moonlit rock—and dial in +1 to +2 EV of exposure compensation. Keep ISO as low as possible to curb noise, then ensure the highlight peaks sit just below clipping. Later, pull the exposure down, fine‑tune the shadows, and you’ll end up with a clean, noise‑free frame that still preserves highlight detail for a low‑light punch.
Optimal Iso Settings When Using Ettr for Clean Noise
When you start nudging the histogram to the right, the first thing to watch is your ISO. Even though ETTR encourages you to over‑expose, you don’t want to crank the sensor’s gain up just to fill the frame. Stick to a base ISO—typically 100‑200 on full‑frame bodies and 200‑400 on APS‑C kits. This way you keep your ISO low and let the extra highlights be captured without inviting grain.
If you’re shooting at dusk or inside a dim venue, you’ll inevitably bump the ISO a bit higher. In those moments, aim for the highest setting that delivers a clean noise image—sensors stay tidy up to ISO 800 or 1600, especially if you preserve detail with ETTR. Enable your camera’s native noise‑reduction, shoot RAW, consider a light touch in post, and you’ll retain the dynamic‑range gains while keeping the grain under control.
5 Game‑Changing ETTR Hacks
- Meter for the brightest highlight, then nudge the exposure a stop or two to the right—just enough to keep the histogram tail just shy of clipping.
- Shoot in RAW and turn off in‑camera highlight warnings; you’ll preserve those “just‑under‑blown‑out” details for post‑processing.
- When using a tripod, lower ISO to keep noise down, then compensate with a longer shutter—ETTR works best when you can afford the extra exposure time.
- Keep an eye on the histogram’s right side; if the peaks start to flatten, pull back a fraction of a stop to avoid irreversible clipping.
- In low‑light scenes, bracket a quick “expose‑to‑the‑right” shot first, then fine‑tune ISO and shutter for the final capture—this ensures you never miss the dynamic range sweet spot.
Bottom Line – ETTR Essentials
Shooting “to the right” stretches your sensor’s dynamic range, preserving highlight detail that you’d otherwise lose.
In low‑light scenarios, ETTR lets you capture cleaner shadows while keeping noise low—just keep an eye on exposure meters.
Pair ETTR with a sensible ISO (typically 100‑400) to maximize clean signal and avoid unwanted grain in the final image.
The Right‑Hand Edge
“When you push the histogram to the right, you’re not just chasing brightness—you’re unlocking the full voice of your sensor, letting every highlight whisper its hidden detail.”
Writer
Wrapping It All Up
Throughout this guide we’ve seen how Expose to the Right (ETTR) can turn a good shot into a great one by nudging the histogram past the midpoint, letting the sensor capture the most photons without clipping highlights. In landscape work, that extra latitude translates into richer skies and more detail in shadowed foregrounds, while low‑light scenarios benefit from cleaner noise curves thanks to the optimal ISO sweet spot we discussed. We also walked through the simple workflow of checking the live view, locking exposure, and pulling back the highlights in post, proving that a few mindful clicks can expand your camera’s dynamic range by several stops. By the end, you should feel confident setting the right balance between brightness and safety.
The real magic of ETTR isn’t technical; it hands you creative freedom. When you stop worrying about “getting the exposure right” and start treating the histogram as a canvas, you’ll see every sunrise, city nightscape, or moonlit trail rendered with a depth that feels almost three‑dimensional. So grab your camera, set the meter to highlight‑priority, and give the sensor a one‑stop nudge toward the right. Remember, the goal isn’t to overexpose, but to feed your sensor the data it craves, letting you pull back shadows later without a grainy penalty. Embrace the process, and let ETTR become your secret shortcut to consistently stunning images.
Frequently Asked Questions
How can I tell if I’ve pushed the histogram far enough to the right without blowing out the highlights?
First, glance at the histogram and make sure the right‑most edge isn’t spiking into a block of pixels. If the curve gently tapers off before the far‑right edge, you’ve stopped shy of clipping. Zoom in on the brightest part of the scene and pull up the highlight‑warning overlay (if your camera has one); no red warnings means you’re safe. Check RAW preview: a bit of highlight detail visible confirms you’ve pushed enough without blowing out the highlights.
Does using ETTR affect my ability to edit RAW files later, especially when it comes to preserving highlight detail?
Absolutely—ETTR actually gives you more wiggle room when you open a RAW file. By pushing the histogram rightward without clipping, you capture extra highlight data that would otherwise be lost. In post‑processing you can bring those bright areas down a notch, recover subtle texture, and still keep clean shadows if you’ve set ISO wisely. Just remember to watch the clipping warning on your camera and turn off any automatic exposure‑bracketing that might overwrite that extra detail.
What are the best ISO and aperture settings to pair with ETTR when shooting fast‑moving subjects in low light?
When you’re chasing a fast‑moving subject in low light, start with a “clean‑noise” ISO—usually somewhere between 400 and 800 on a modern full‑frame, 800‑1600 on a crop sensor if you need a little extra lift. Pair that with the widest aperture your lens will comfortably hold (think f/1.8‑f/2.8) so you can crank the shutter up to a safe 1/500 s or faster. Then, using ETTR, push the exposure just shy of clipping (about a stop or two left of the histogram’s right edge) to squeeze every bit of dynamic range out of the sensor while still preserving those crisp highlights. This combo gives you a bright, low‑noise image and enough motion freeze to keep the action sharp.